Table of Contents
TECH2018/S1/Running installation wizard
There are a number of steps required to install WManager after downloading. This page is a helpful guide to install WManager.

STEP 1
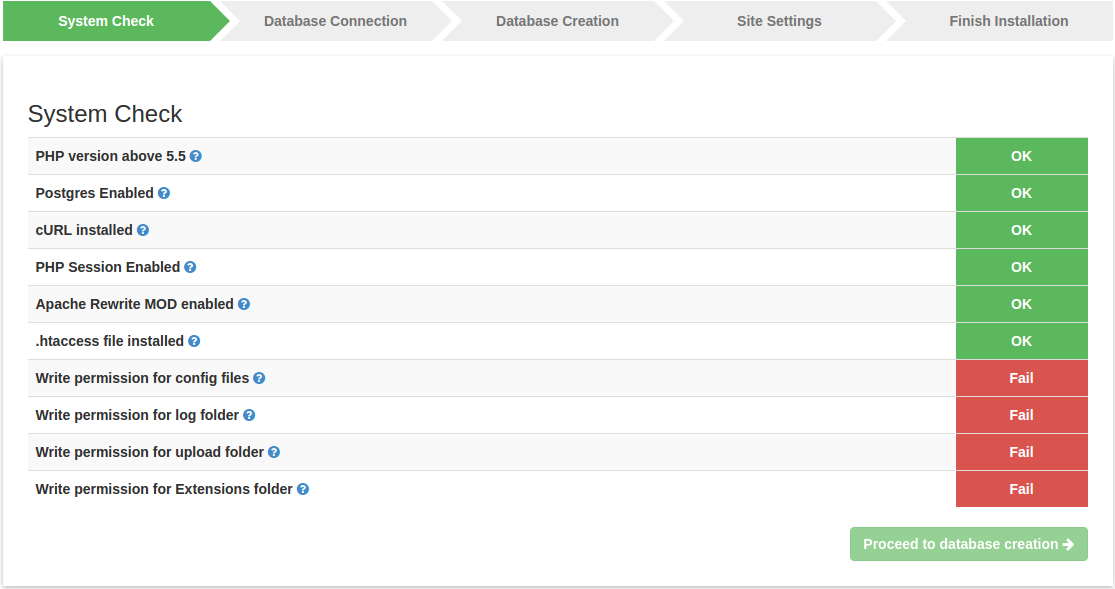
The system will check the configuration and basic needs for installing the WManager.
Please click on help button for configuration
- Provide read, write and execute (0777) permission for /application/config/ folder.
- Provide read, write and execute (0777) permission for /application/logs/ folder.
- Provide read, write and execute (0777) permission for /assets/uploads/ folder.
- Provide read, write and execute (0777) permission for /application/modules/ and /application/cron/ folder.
STEP 2
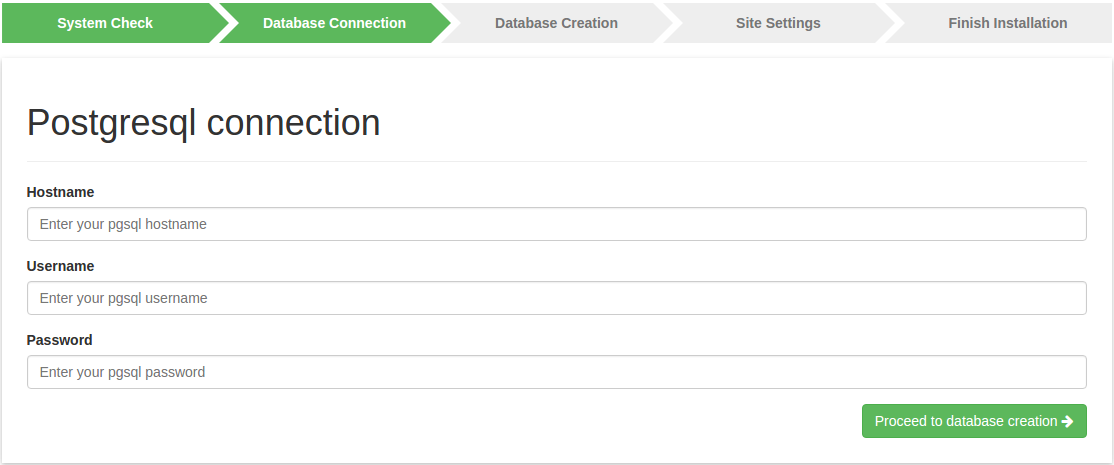
Provide the postgres hostname, username and password to test the connection to postgres. After the connection test, the system will redirect to the database creation page.
hostname : localhost
username : wmanager
password : password
STEP 3
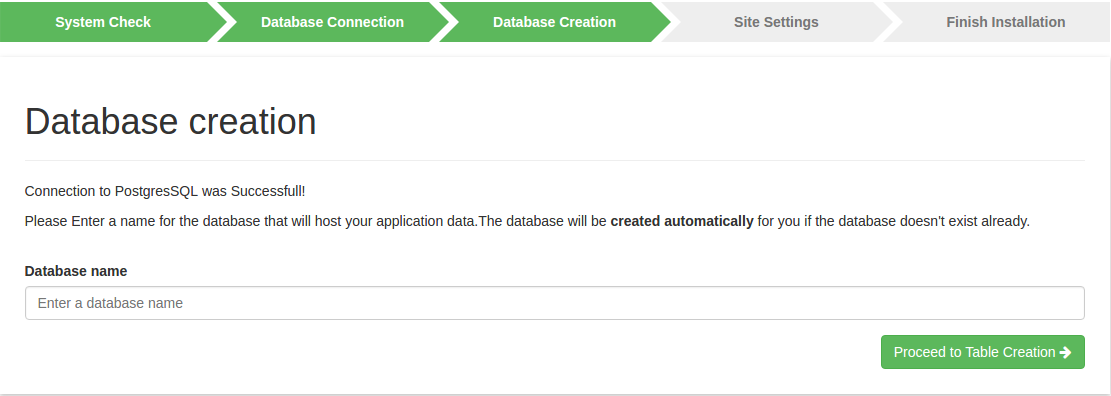
Enter the database name which you want to create or enter an existing database name which you have already created with no tables in it.
After step 3 system will check the database and show the status of the database
STEP 4
After creation of database, the system will add all the tables which are necessary for the WManager.
Insert all the site setting details and click on processed.
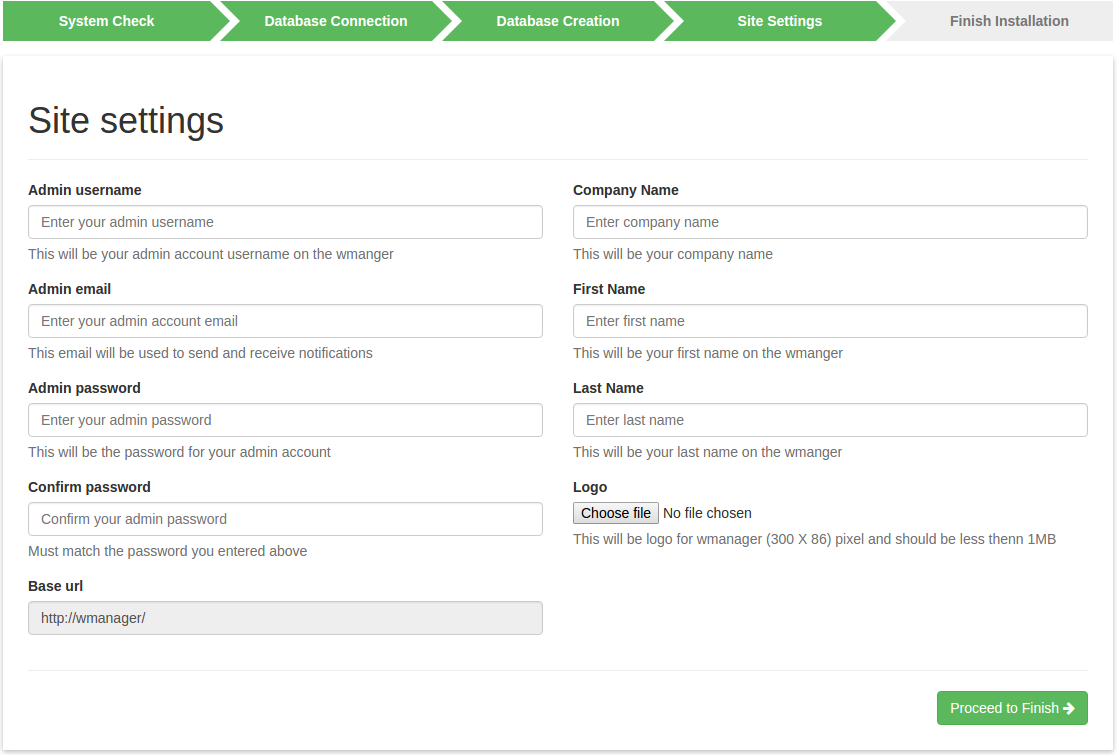 Note : All the fields are compulsory in site settings expect logo
Admin Username : Username for the admin
Admin Email : Email id for the admin
Admin Password : Password for the admin
Confirm Password : Re-enter the Password for the admin
Base Url : Automatically taken from the virtual host setup
Company Name : Name of the company
First Name : First name of the admin
Last Name : Last name of the admin
Logo : Any new logo for the application
STEP 5
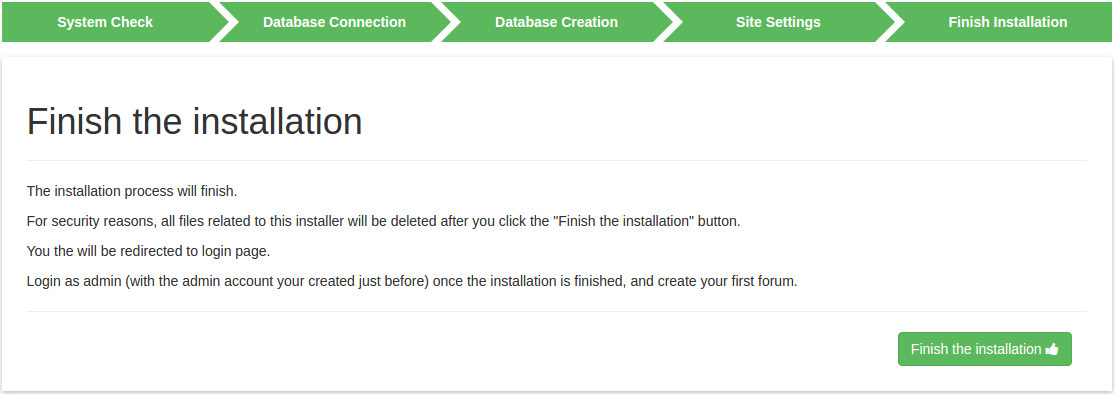
This is the final stage of installation where it will show the details and remove all the installer files which are not necessary.
WMANAGER LOGIN
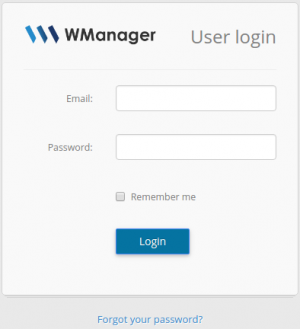
After the installation user will be redirect to login page of the application
- Login screen will authenticate the user based on the EmailId and password which has be created in the sites settings
- After user is authenticated, the system will redirect the user to WManager dashboard
